

Rosary Instructions: Back to Navigation
KNOTTING
INSTRUCTIONS ~
![]()
These knotted rosaries and chaplets are made up of one single, wrapped knot which is repeated for each bead, using different sizes for different prayer beads. It is also used to make the cross. Take a length of cord and try several before beginning. We made the chaplet first.
FIRST MAKE A TEST KNOT
1.Hold the last 6 inches of 36 in cord in your left hand,
allowing the cord to follow the length of the index finger. This
will give you the 'host' cord. 2.Wrap longer
end of cord (away from you) around index finger and 'host' cord
several times, moving the loops back towards the hand to cover
the 'host' cord. 3.Slip loops off of finger
onto 'host' cord. 4.Slowly pull long end
of cord all the way through the loops, make sure loops remain
lined up. 5.Position and tighten the knot.
Note: sometimes the loops want to cross over themselves while you are trying to tighten them on the host cord. Either correct or start that knot over. We discovered that as the loops are released from the finger to the host cord you can tighten the loose knot by slowly pulling and rolling it with your fingers (away from yourself). As the knot gets smaller you can also position it on the cord. Once in place, give it a tug to secure it.
KNOT CHART SUPPLIES
& MEASUREMENTS
PEACE ROSARY - 3 1/2 yards of #36 nylon cord
5 DECADE ROSARY - 6 1/2 yards of #36 nylon cord
matches or a lighter (lighter is best)
scissors (to trim cord ends for burning only)
Table knife (to flatten end of hot nylon cord)
Patience (to get started..its really worth it)
MEASURE OFF CORD
PEACE CHAPLET - 3 1/2 yards #36 cord
5 DECADE ROSARY - 5 1/2 yards #36 cord
1. BURN CORD OFF OF TUBE
(Burning seals end. It frays badly so don't cut. Tying a knot restricts the
movement of cord through loops when the knots are being made.)
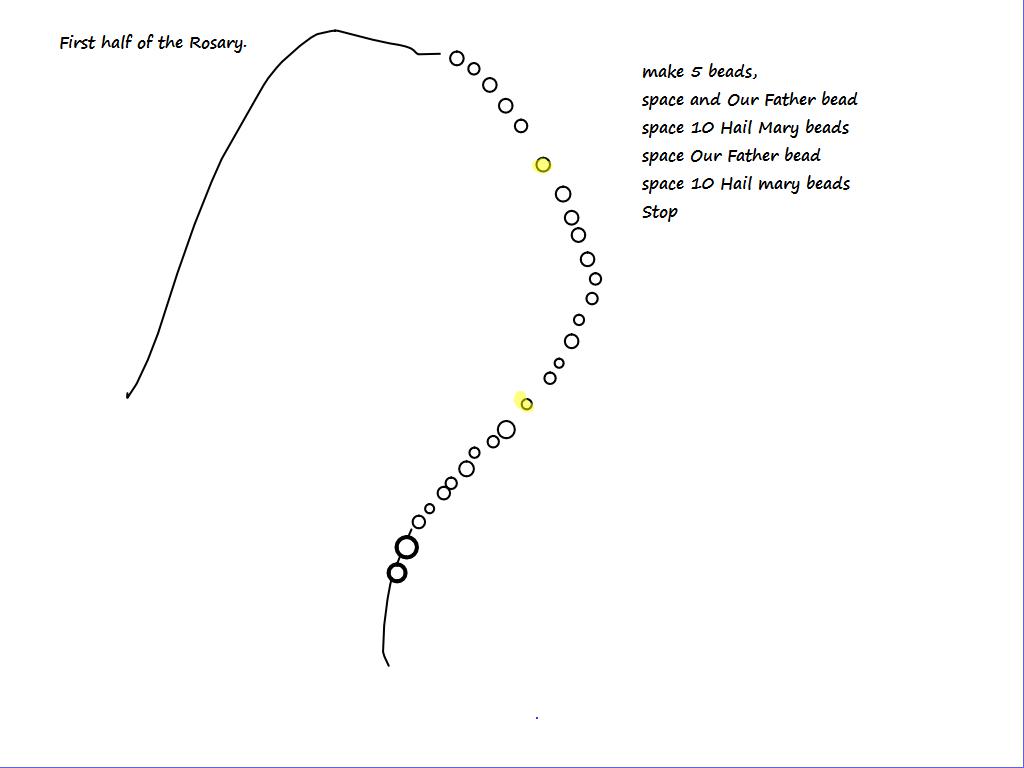
2. FOLD CORD IN HALF - START IN CENTER
Fold cord in half and begin in the center.
-- a. FIRST KNOT - Using 3 wraps, make first knot.
Repeat twice, keeping beads close together and tight. Leave a 1/2in space at
most.
-- b. REPEAT - Ďa' until your count is compete . Check
distances and tightness.
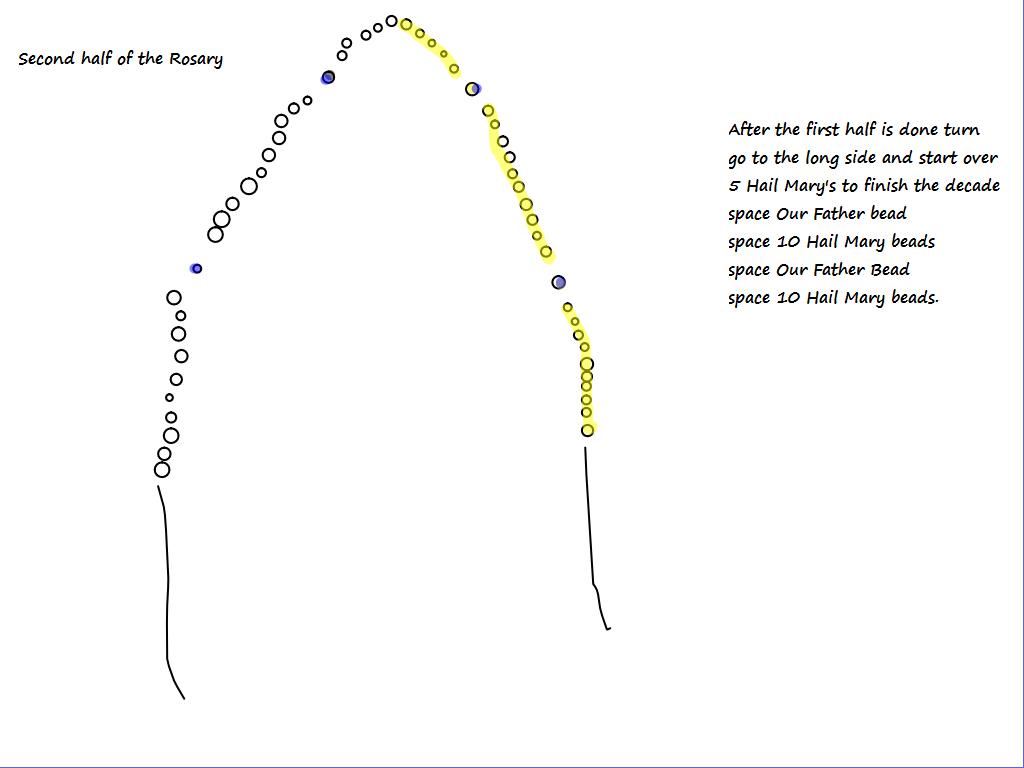
-- c. RETURN TO CENTER - leave a 1/2 inch space. Begin next
set of 3 (or 10) knots. Repeat until count is completed keeping an eye on
how the cord is being used up as on rosary so adjustments on decades may
be made if necessary.
3. FORMING LOOP
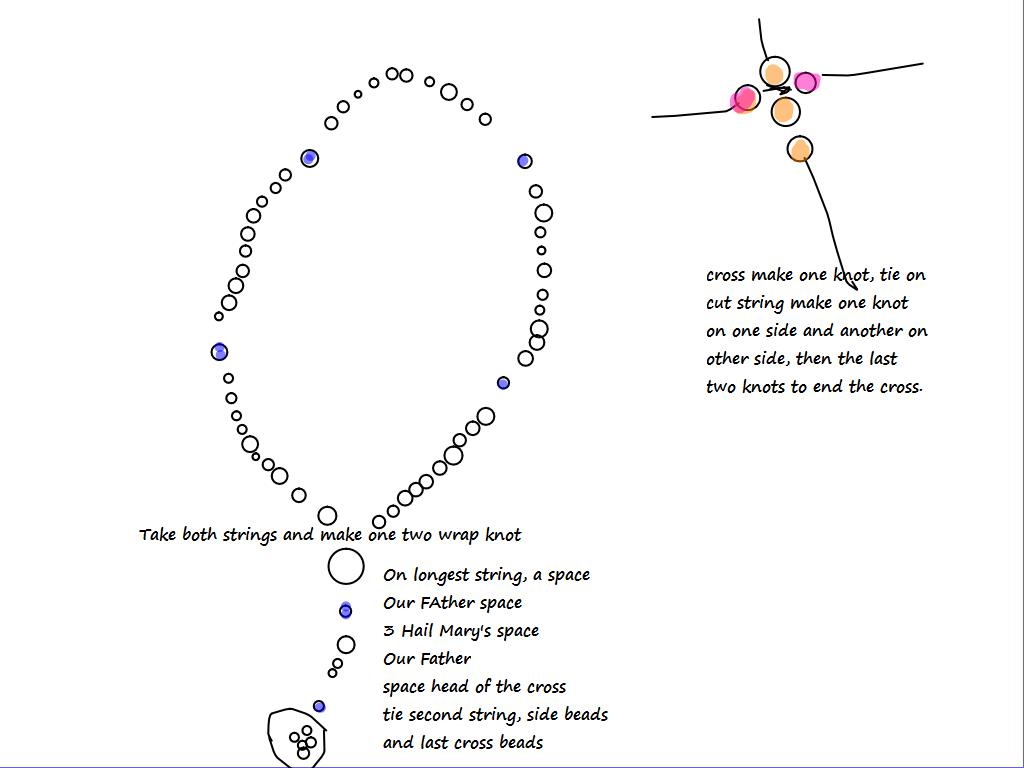
-- d. TO CONNECT - Align both end beads together in your hand. Leave 1/2 in
space.
-- e. KNOT TOGETHER - by looping both cords over your finger twice.
Pull two cords through. Position and pull tight to secure. (Trim shortest
cord to 1/2in and leave till last.)
4. FORMING PENDANT
Working on longest cord. continue making knots according to need.
5. FORMING CROSS
Leave 1/2 in space. Make a knot using 5 wraps. (let other cord hang for now).
-- f. TO FORM CROSSBAR - tie a 15in cord directly
under the knot (first part of a shoelace knot)
-- g. SECURE CROSSBAR - by tying one more knot using
5 wraps directly underneath the cross bar. Pull knot tightly against the cross
bar. Optional: Repeat knot for longer cross. This completes the vertical
part
of the cross. Let cord hang
-- h. FINISHING CROSSBAR - tie a knot using 5 wraps on each side. Pull
tightly against the center. Let loose ends of cord hang.
6. BURN OFF ENDS:
Its easier to burn off all ends at one time.
-- i. TRIM ONE END - with scissors about 1/4
in away from rosary.
-- j. BURN OFF - end and quickly flatten melted nylon ball
against knot with the blunt side of a kitchen knife. (careful, its hot)
-- k. REPEAT - t on other ends.
-- l. CLEAN ENDS - by running flame over end - if necessary.
Reheat and flatten again if needed being
careful not to burn rosary (or your fingers).
7. PRAY - PRAY - PRAY!
Have rosary or chaplet blessed as soon as possible!
give them away and make more!